 I am not an artist. Not even remotely close. I could demonstrate by showing you my sickly looking stick people, but you’d probably run away crying in fear. Seriously, it’s that bad. My grandmother could draw beautifully and she passed that talent down to a few family members, along with her ability to cook. To me, she gave her short height and her love of chocolate-covered pretzels. Not a great combination!
While I was trying to come up with an idea of some type of cool St. Patrick’s Day craft that I could create, pin for Pinterest and convince droves of people to come visit my site under the belief (albeit false) that I have some sort of talent creating stuff, I came across this whole Subway Art craze. “Holy canoli!” I thought (although I used a less family-friendly word), “this is something even my talentless self can make!” Yes, people, it is THAT simple to make cool subway art.
What is Subway Art?
Basically, it’s a type of typography art featuring a bunch of words related to a certain theme all together on a single printable surface. Typically, it involves the use of several different fonts, which give it visual appeal. I’m not sure if that’s the actual definition, but it’s pretty much as close to a definition as I could come up with. I’m not really sure where it originated. If anyone knows, tell me and I’ll update this post.
How to Make Your Own Really Cool St. Patrick’s Day Subway Art
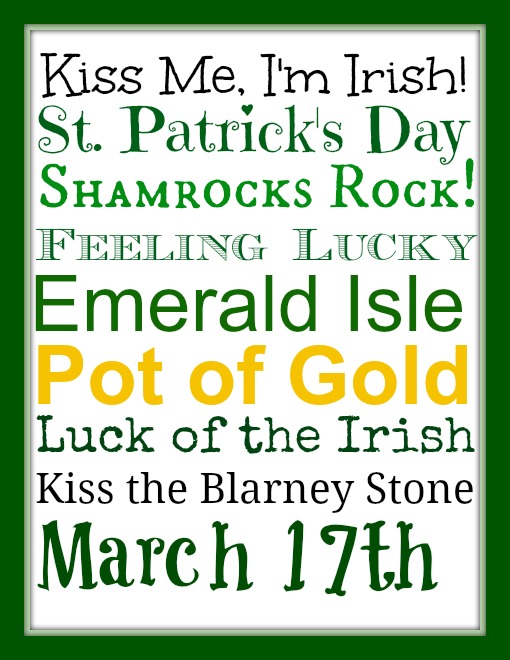
This tutorial actually works for any holiday or theme, but since St. Patrick’s Day is coming up, I did it for that. To be perfectly honest, you can look at my example above and pretty much figure out exactly how to make your own subway art. It’s not rocket science. I figured it out on my own, so you know it has to be easy. Basically, this is less of a tutorial and more of a “tips” how-to.
1. Find a list of words or phrases that you want to use. For St. Patrick’s Day, I went with traditional words that I already knew off the top of my head. If you’re lost for words, try searching “words related to xxxxx,” with the x’s representing your theme. Gather more words than you think you’ll use, just so you have more choices.
2. Create or download a basic blank background. I just made a plain white one by opening up my paint.net program (it’s free) to a new, blank slate, resizing it to the size I wanted, and saving it as a plain background.
3. Go to PicMonkey. You can use any photo editor really, but I love them because they’re so easy to use. Choose “edit a photo” and open your plain background image. Go to the “Add Text” function. It’s the little “P” on the sidebar. I was going to take a screen shot to show you, but let’s not be silly here. You all know how to find a little “P” without pictorial assistance.
4. Add each word individually. This is important because when you start choosing the different fonts and resizing the words, it makes it so much easier. Start with maybe five or six words. Type them all out, then stack them in list format.
5. Change the fonts, colors, and sizing. Go with two or three colors at the most, or variations of those colors. You don’t want it to look too busy, but definitely want enough variation to make it pretty. For fonts, you can go with six different fonts or alternating just two or three. Really, there is no rule here, just do what you think looks pretty. Sizing is the only thing that really matters most, as you want each line to start and end in roughly the same location to create a symmetrical look.
6. Add a frame…or not. Adding a frame boxes it all in neatly, and I prefer that method. I’ve seen frameless subway art too, though, so it’s totally up to you.
So what do you think? Pretty easy, right?


Cute. Thanks for sharing.
This would be fun for lots of holidays! Neat idea!!
I really like that! And I love the colors and fonts that you used!
Dawn
Thank you for sharing your tutorial! I knew PicMonkey was great for a lot of things, but I didn’t think about uploading a blank template to do something like this! Maybe I can do birthday subway art for Bubbles’ party this weekend 🙂
I love Subway art! I have a wine subway art in my dining room!
I’ve heard of this called word art, but never subway art, interesting! It’s amazing what you can do with fonts (and don’t worry, I’m not artistic either)
That’s really neat! Thanks for the tutorial!
What a quick and fun project! I like the fonts and colors you chose for your example.
Very cool! I never thought to just make my own! Well done.
Thank you! 🙂