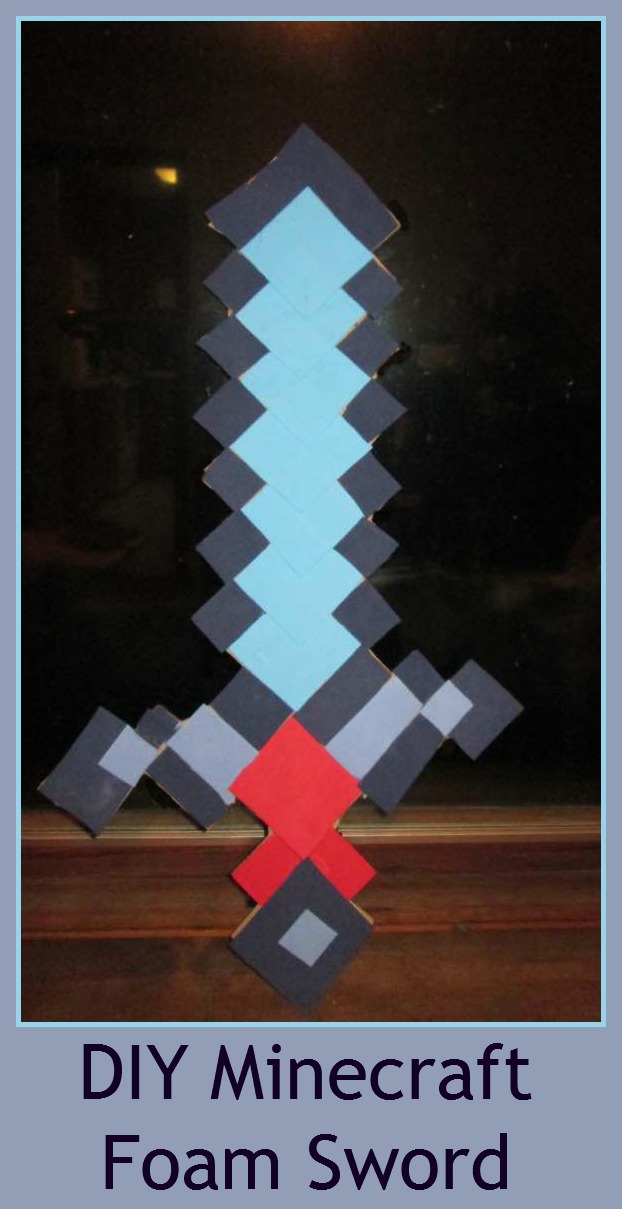
Like many kids, Jacob is a huge Minecraft fan. When he got his birthday money, he saw a foam Minecraft sword in the store and really wanted to get it. I was shocked when I saw the price tag read $24. For a foam sword? Are you kidding me?? While I typically let him control his own birthday money, there was no way I could watch him waste that much on a foam sword. The game itself only cost like $25 when I got him for him for Christmas! So I told him we would figure out a way to make our own Minecraft foam sword for a lot less. Last night, I finally delivered on that promise.
Now, if you’re a regular reader, you know I’m not the craftiest person around. Don’t expect miracles here, people. My DIY Minecraft foam sword may not be perfect, but guess what? It’s also not $24 freaking dollars! In fact, I paid less than $5 to make it, and I still have enough supplies left over to make like five more!
How to Make Your Own Minecraft Foam Sword
Supplies Needed:
- Several sheets of foam in different colors. We used three different blues and a red. The blue sheets were on clearance at Michael’s for $0.19 each, and the package of 40 smaller foam sheets were on sale for $4. Otherwise, the big sheets would have been $0.99. You’ll need at least two big sheets and one small sheet.
- A cardboard box long enough to provide the backing, plus extra to reinforce it.
- A square template for tracing (I cut out a 3×3 square from a card-stock junk mail flyer)
- Glue (we used Elmer’s glue sticks)
- Scissors
- A lot of patience (it took me two hours to make)
Directions
- Cut open your box so you have a nice big, flat surface to work with.
- Starting at the bottom, lay your square tracing template in the middle so it is a diamond shape. Trace with a pencil.
- Work your way up, placing the template in the middle of the previous diamond so they overlap.
- When you get about three of those, you’ll want to work your way over to the handle. Look at my picture for an idea of how it should look. Do it better. That’s the one spot I goofed up on. It’s a bit lopsided!
- Continue tracing the diamond shapes all the way up like you did with the base, overlapping each one.
- Add tilted squares down the side, like in my picture. I don’t know how to describe them, sorry. Honestly, I figured out how to do it by looking at a picture of the real foam sword.
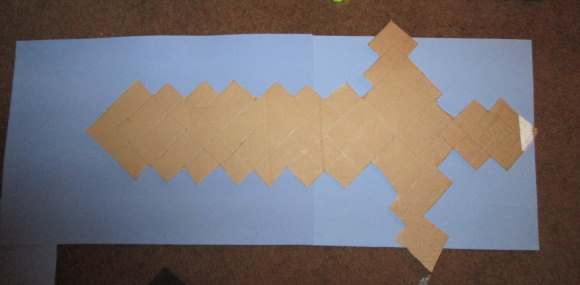
- Carefully cut out the sword backing with a pair of really good scissors. This is what you’ll have:
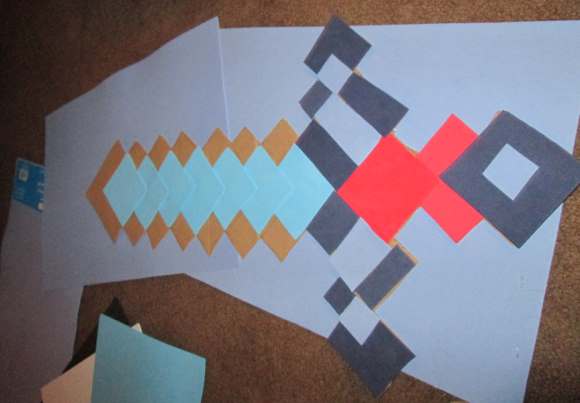
- Next, it’s time to start putting the foam on! This is where you can get creative. Use your template to trace the bigger shapes. For the smaller shapes, I put pieces of foam against the area I wanted it to fit then used the scissors to score along where I could feel the cardboard beneath the foam.Then I cut the pieces.
- Glue each piece to the cardboard backing, working your way up the sword until it is covered.
- Flip it over and reinforce the back with extra cardboard. I used duct tape to tape long strips of cardboard to the back so it would hold up.
That’s pretty much it! It’s a bit time-consuming to make your own Minecraft foam sword, but totally worth it when your kids tells you that you’re awesome! Next, he wants me to make an enchanted pick axe! Ugh! What do you think? I know it’s not as pretty as the store-bought ones, but I’m still pretty proud that I managed to pull it off!


