Want to make dozens of social media graphics in minutes even if you have no design skills? Check out my RelayThat review to see how to make that wish come true!

FYI, I’m a RelayThat affiliate, so if you sign up through the links within this post, I get a commission at no extra cost to you.
What is RelayThat?
RelayThat is, in their own words, a “design automation app that everyone is switching to.” What does that mean? Basically, it’s as close to a one-click graphic design system as you can get.
I signed up for it a few years ago through one of those AppSumo lifetime deal thingies. I bought a lot of their blogging tools deals back in AppSumo’s good old days where nearly everything cost between $39-49 (versus the current $60+ average, which is still a great price, just more than my sad bank account can afford).
Anyway, while I thought RelayThat was neat for a few quick social media images, honestly, it was a bit too limited for what I needed, especially for Pinterest. So, I kind of forgot about it for a while. Then sometime last year, I was going through all of those lifetime memberships to see what- if anything-had changed. A few definitely changed for the worse, some barely at all.
RelayThat, however, was a VERY pleasant surprise! They clearly listened to user feedback and added all of our biggest wish-list items…and then some!
RelayThat Review: Features, Pros and Cons
Let’s start with the features and pros (which are basically the same thing). Then, we’ll take a look at the cons and a few things I’d like to see improve over time.
Features and Pros
We’ll do a quick bullet-point rundown of the features and pros. Then, I’ll share some screenshots and details about my favorites.
- Up to 20 different workspaces, where you can manage all of your brand’s styling assets (logos, colors, fonts, etc).
- Intuitive dashboard with a relatively low learning curve
- TRULY one-click resizing (see below, this is the BEST feature of all).
- Over 2,000 layouts for every social media network + things like banners, video stills, book covers, business cards…pretty much everything imaginable.
- Magic Import lets you import images and post titles from a URL.
- Save and download an infinite number of images.
- Download in JPG or PNG format.
- Teams- Add teammates to help create, edit and review images. I’m the only one who does graphics for this site, so I don’t use this feature, but it’s nice to know I can!
- Access Pixabay within the dashboard to add copyright-free images in seconds.
- Tons of great fonts already loaded, or upload your own.
- Font and color combo inspiration (the font combos are still fairly limited, but the color schemes are very nice!)
Let’s take a closer look at some of my favorite features, starting with workspaces (since that’s literally where you’ll start when you use it for the first time).
Workspaces (up to 20 on a Pro account, unlimited on Enterprise)
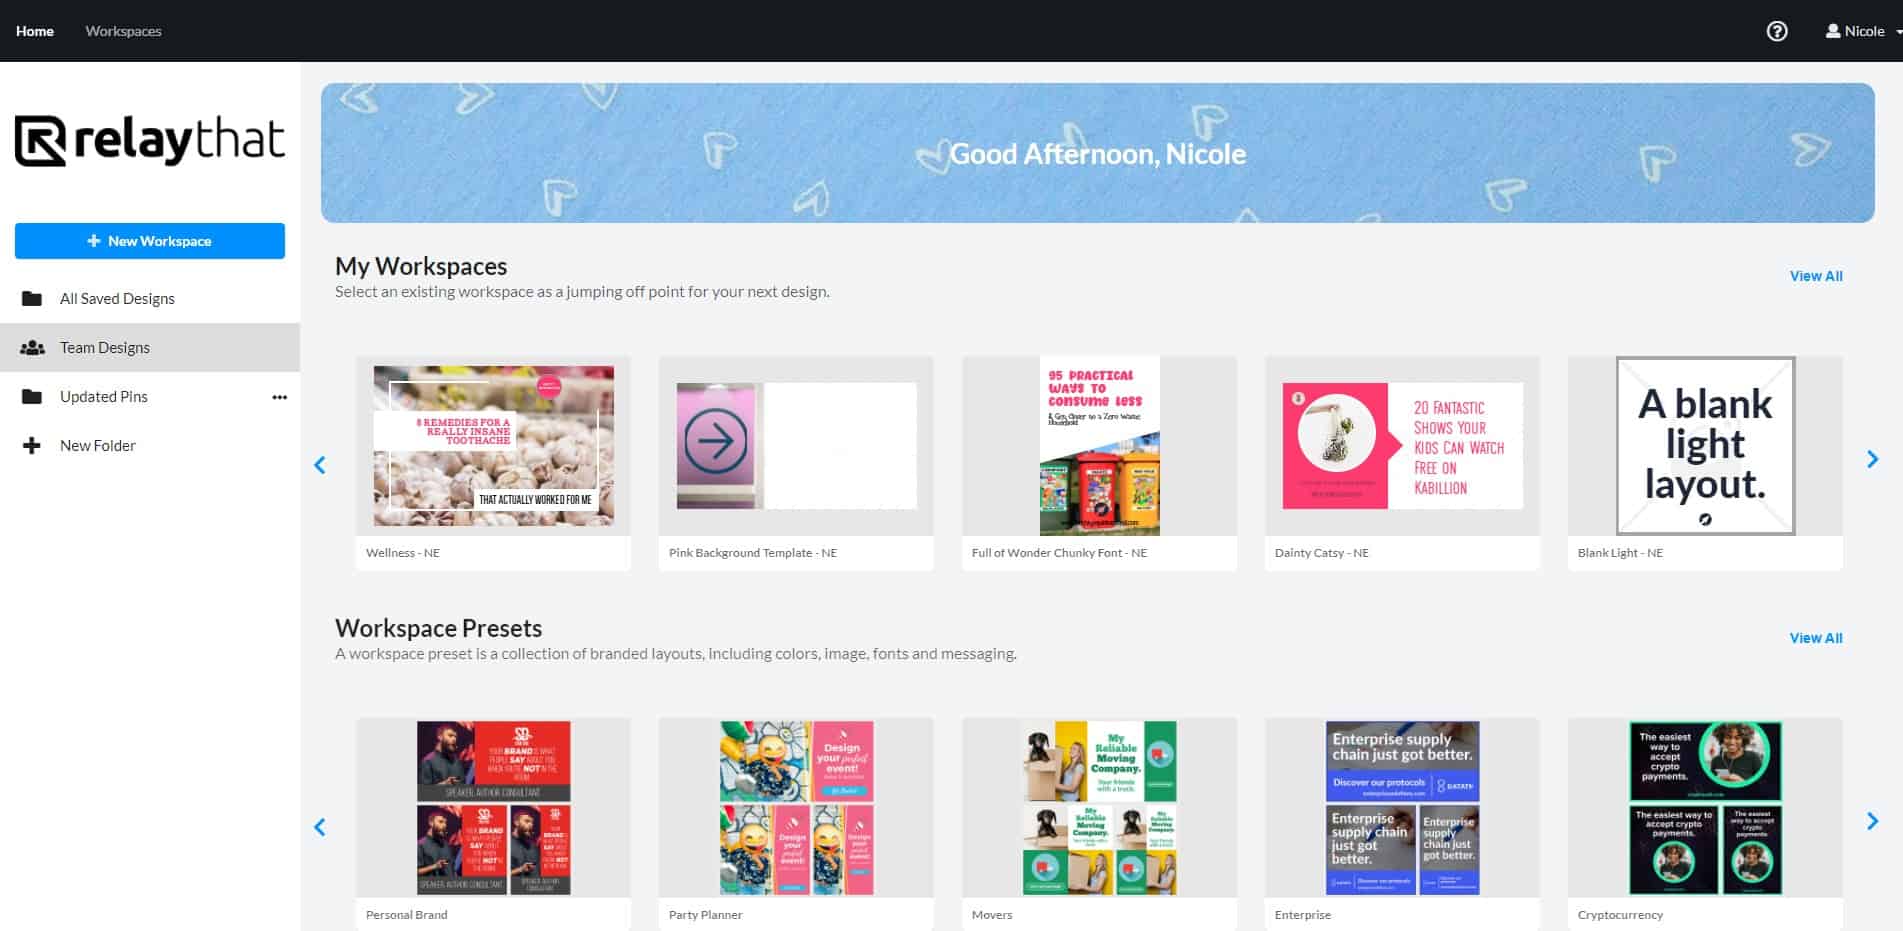
When you first start using RelayThat, you’ll begin with something that looks a bit like the screenshot below:
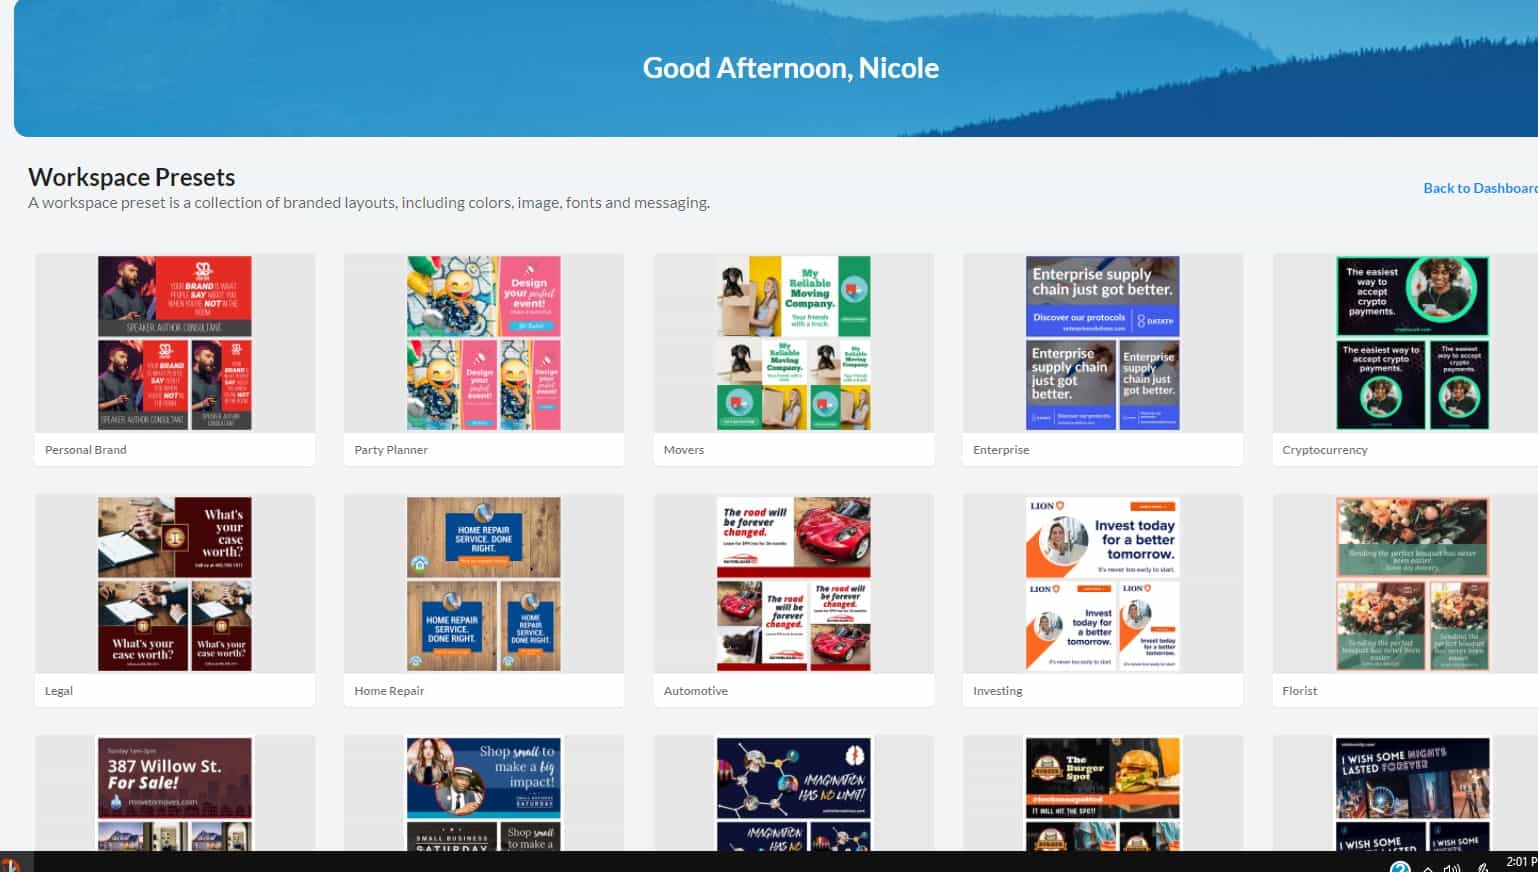
Basically, you have two main options here. One, choose one of the 25 Workspace presets and customize it to fit your needs or start with a blank layout and build it from scratch. I have a few workspaces that I use (although I boogered up my “pink background template” when I was messing with color schemes, more on that in the “cons”).
You’ll also see your folders, if you have any. I only have one right now because I didn’t even know there was a Folders option until I started taking screenshots of things. Even now, I’m always discovering new features.
Intuitive Dashboard
Load up your favorite Workspace and you’ll head into the dashboard. There, you can tweak colors, fonts, logos and so on until you’re happy. There are tons of videos and tutorials on how to do this in the Help section if you need them. The only thing that isn’t all that intuitive is finding out where to upload your assets.
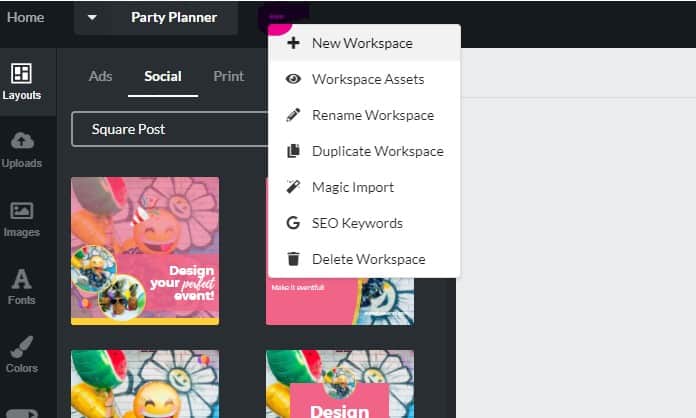
Click on the three dots up next to the name of your project. I tried to highlight it in the screenshot above There, you can quickly navigate to assets as well as duplicate workspace or use Magic Import. Which brings us to…
Magic Import
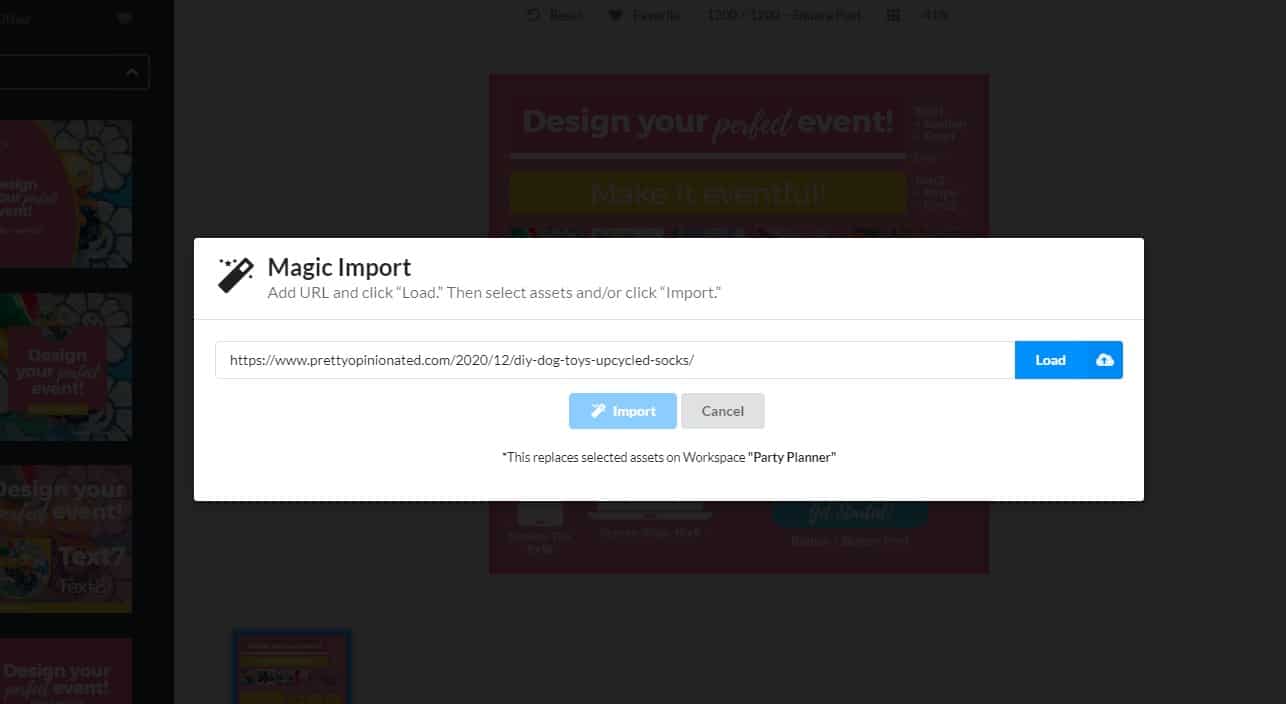
Okay, so you just pop the URL of your blog post in, then you get this:
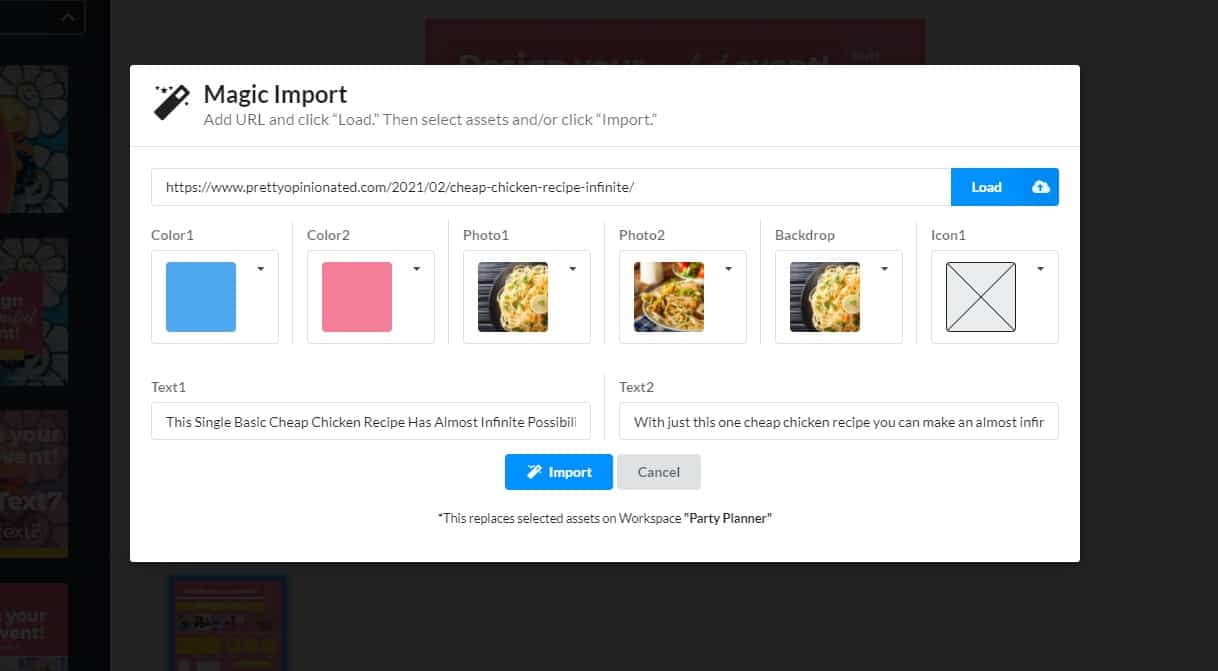
This feature still needs a bit of work, honestly. It didn’t find my site icon or my colors, and I would like the option to load in more images. Still, pretty handy!
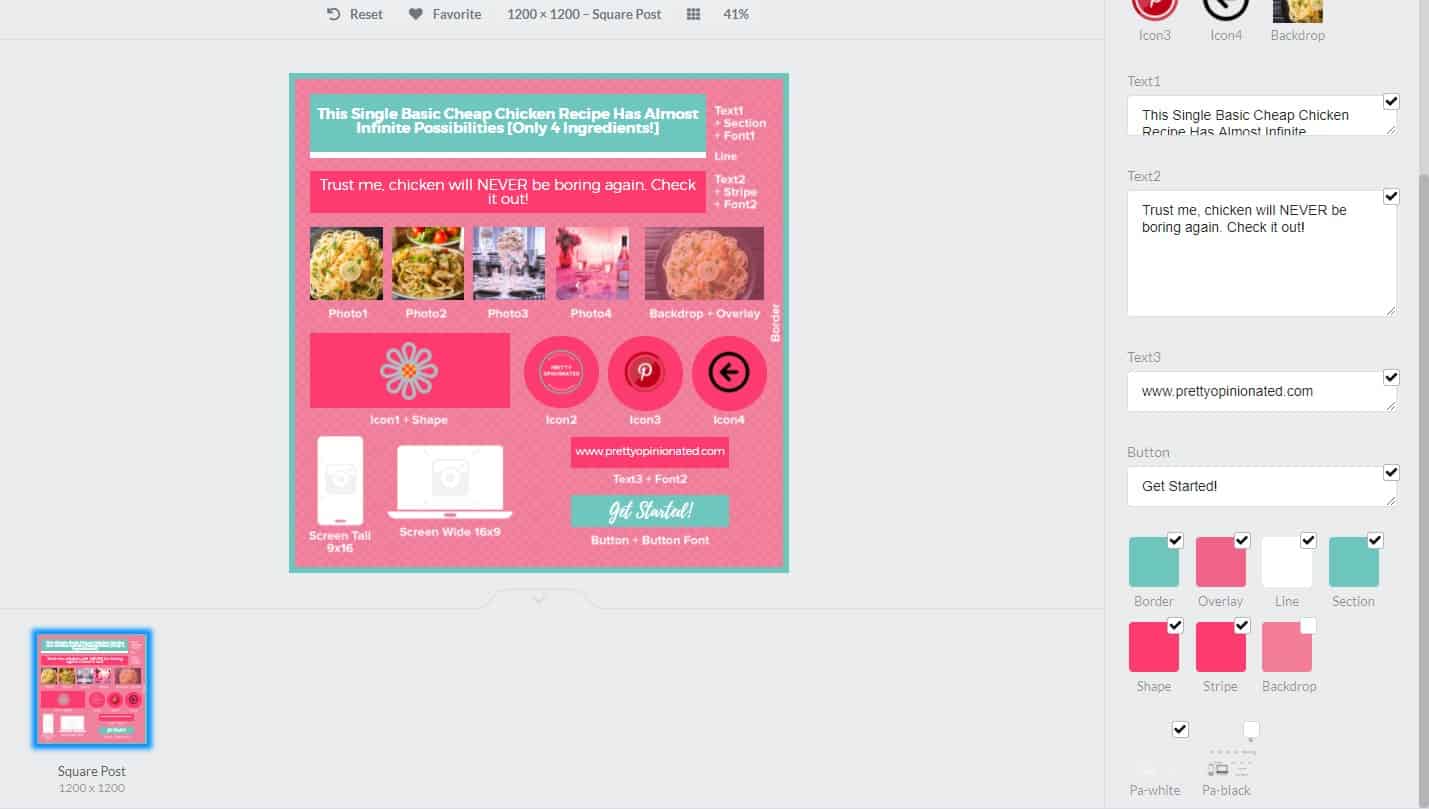
Once you click import and go back to your assets workspace, you can tweak the colors, icons, fonts, etc.
Over 2,000 templates for social media & more
Once you’ve uploaded your assets (btw, you don’t have to, you can just jump right into a template and upload as you go), you’re ready to start clicking your way to countless social media images. Start by picking the size/type that you need:
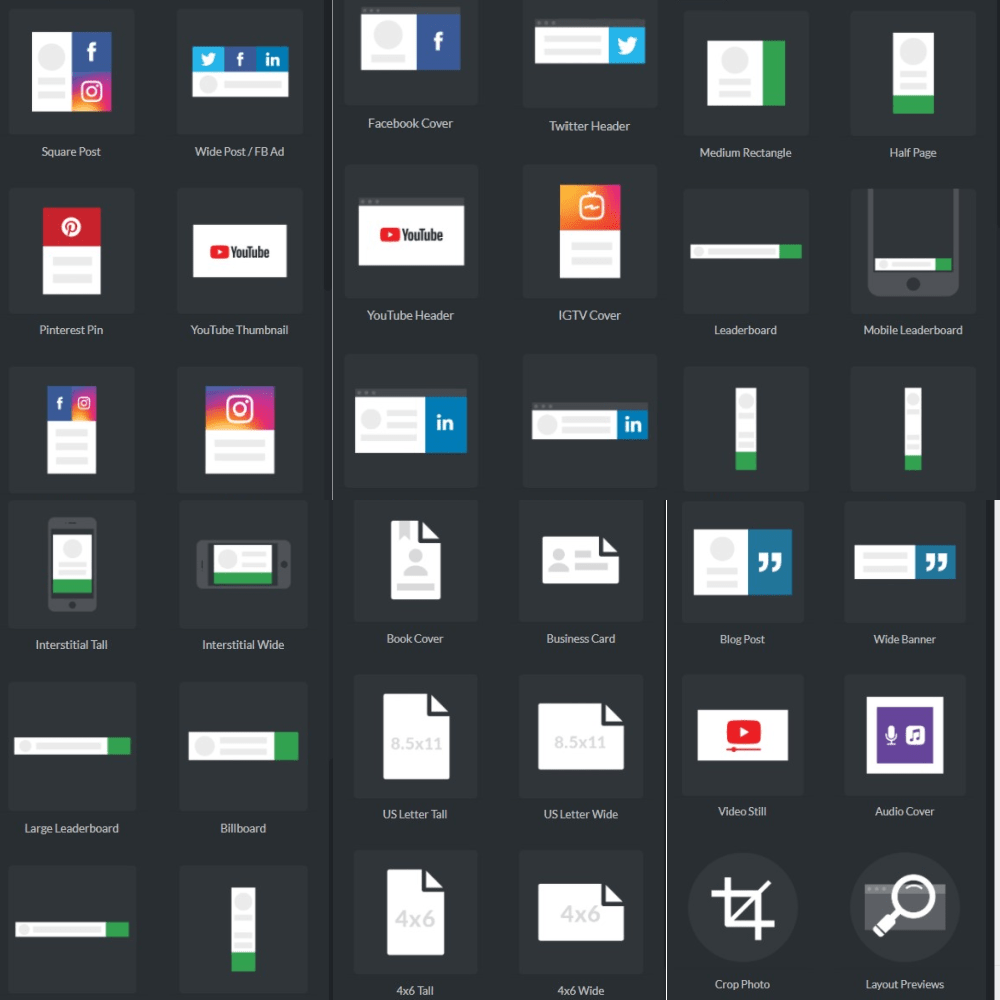
Then, within each size, you’ll find dozens of templates. I love that you can basically skim down the line and see what each template will look like with your elements without having to load each one.
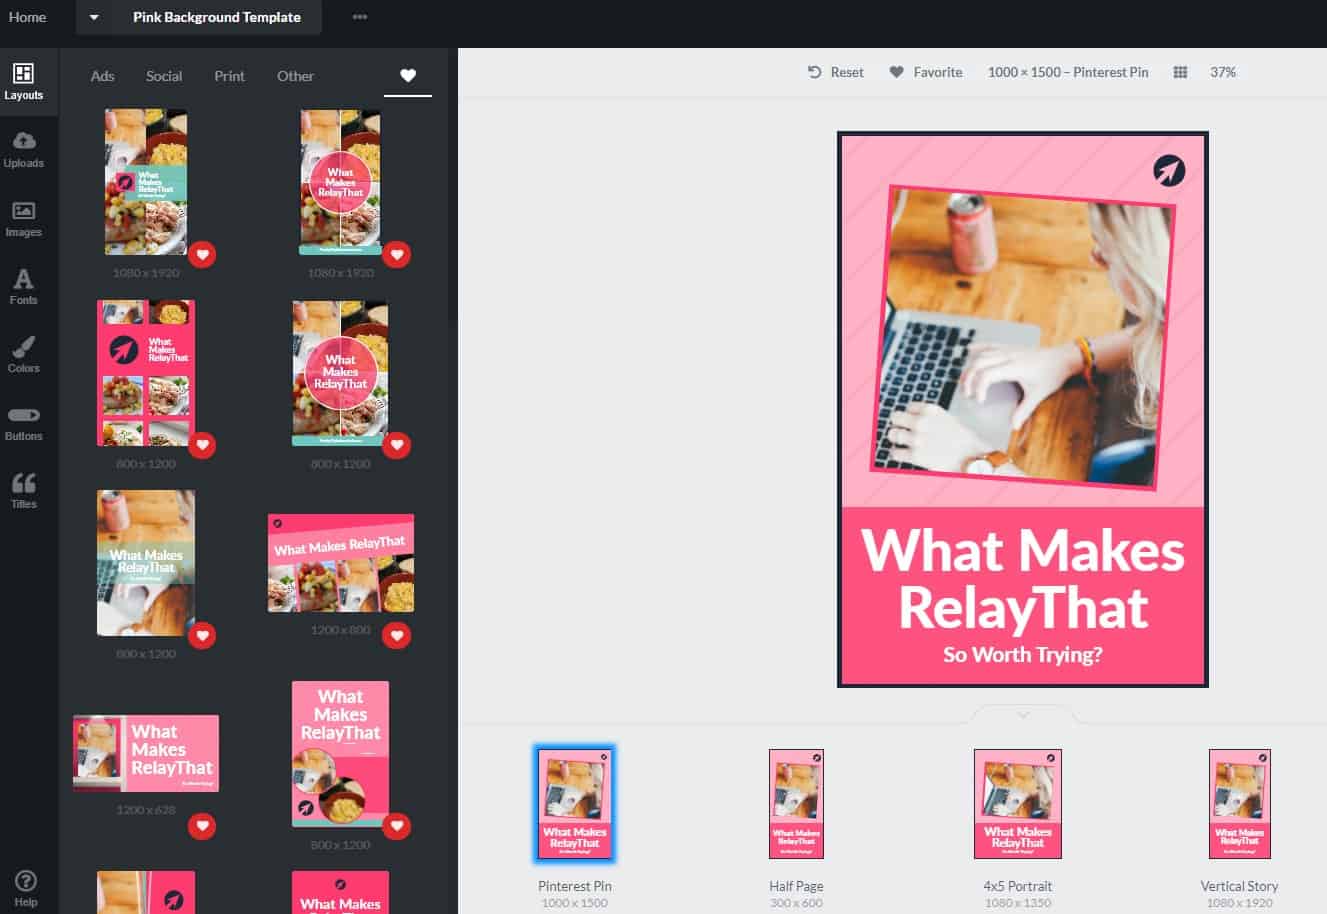
Keep in mind, though, that you can tweak whatever one you choose. For example, if you go with a collage-style layout, you can add more pictures to it if needed. You can also swap the text around and what not, too.
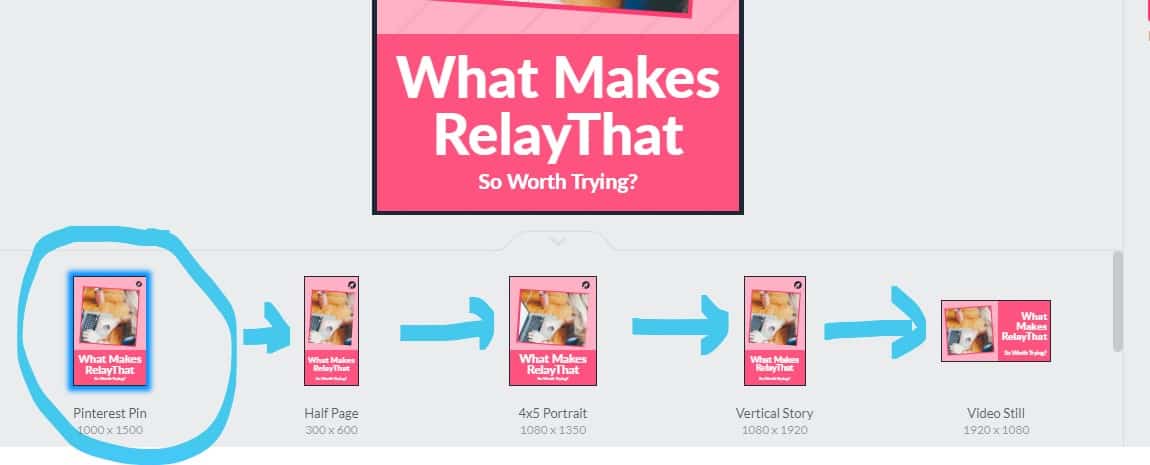
One-Click Resizing That Actually WORKS
Both Canva and PicMonkey offer some sort of “smart resizer,” but their versions basically just copy elements over to the new size, all willy-nilly. More often than not, they look all out of whack and you have to fiddle with them a lot to get them right again.
RelayThat automatically resizes & repositions all elements for one with ONE click. Literally one click.
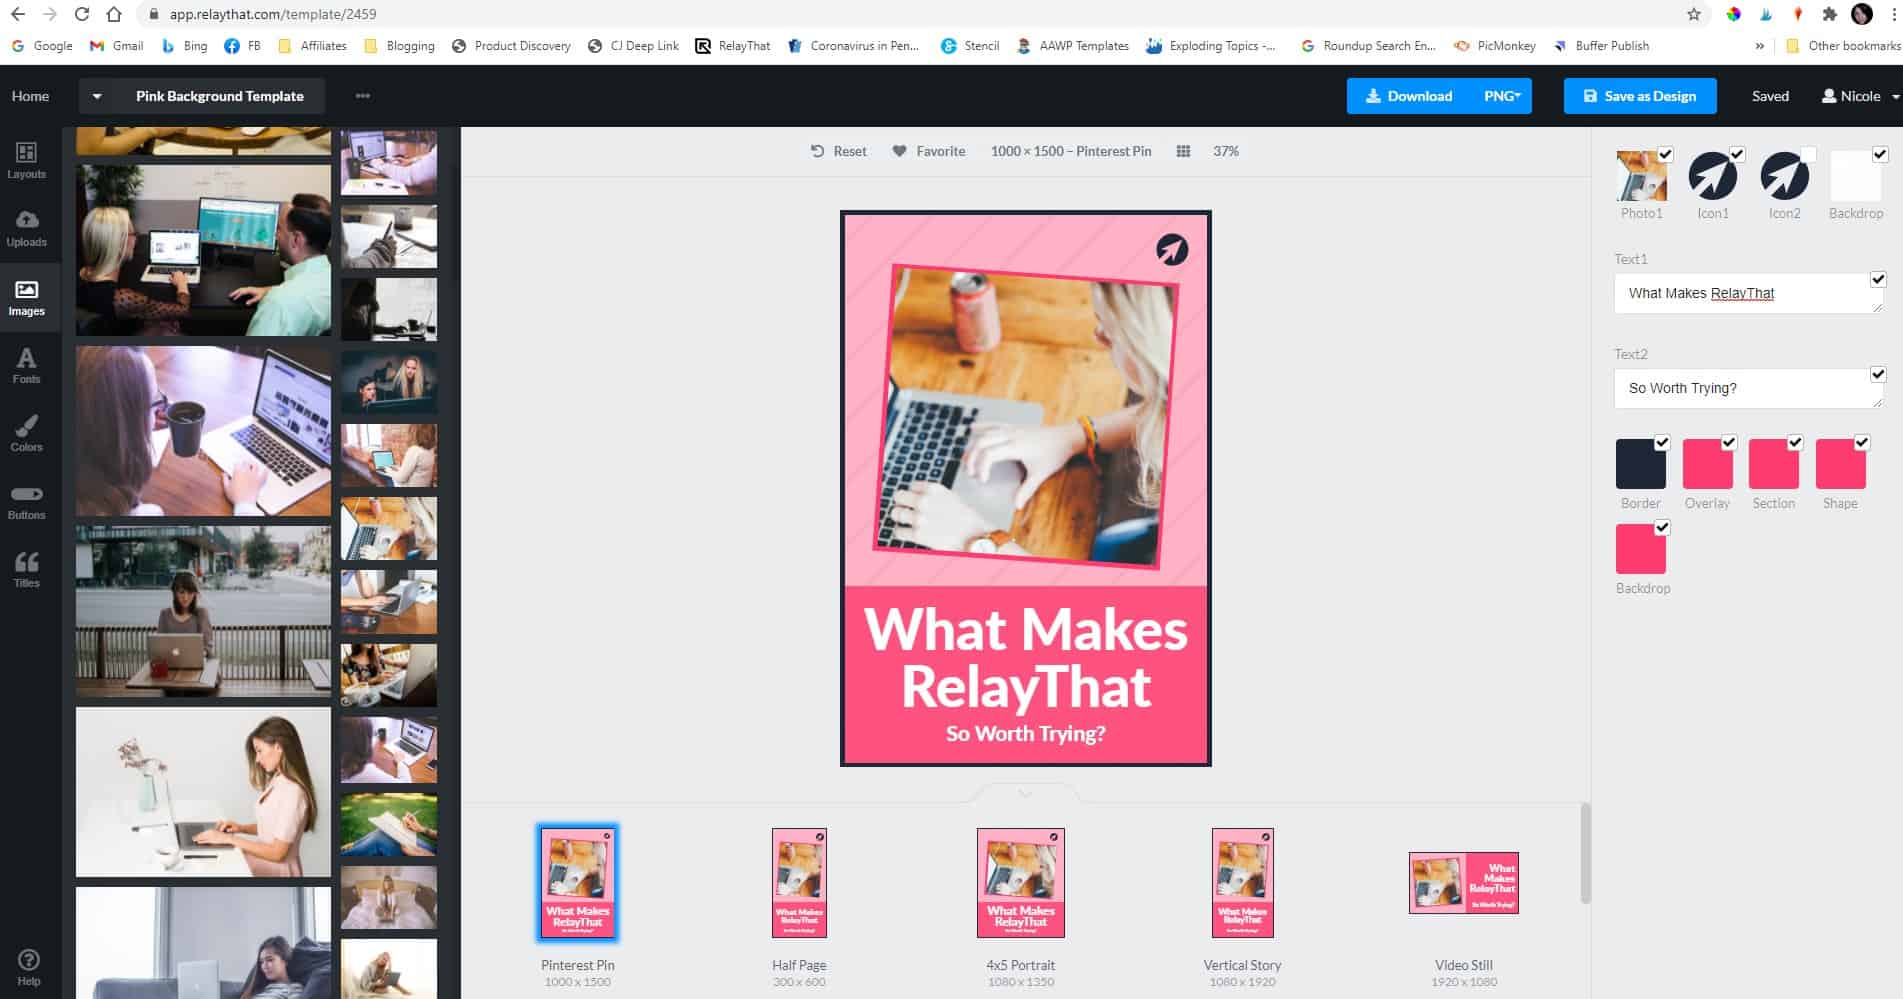
Add Stock images from Pixabay right in your dashboard
This one is both a pro and a con. I’ll explain the “con” side of it below. The pro, though, is pretty obvious. You can access Pixabay’s library of free stock images without leaving your RelayThat dashboard. They also have a decent library of icons, too, if you need them.
While RelayThat is definitely full of great features, it does have some limitations and drawbacks.
Cons
- Limited selection of stock images
- When uploading your own images, you can only do one at a time. It’s a bit of a pain when you have a bunch to upload.
- Plans are pricier than Pro versions of other major graphic suites
- Once you choose one of their color or font combo ideas, you can undo it and go back to what you had.
- Can’t download as PDF
Limited selection of stock images
As of now, Pixabay is your only option for adding images right from the dashboard. I’d like to see them at least add Unsplash as another option.
Also, for the price, I feel like we should have access to something other than just free stock images. PicMonkey Pro and Canva Pro both offer a fairly robust library of iStock (by Getty) images. So, personally, I feel like while the stock library is helpful, it’s not quite on par with what you get with other graphic design suite memberships.
For now, I use the Pixabay library here and there and mostly just upload my own images.
Somewhat pricey
RelayThat has two membership tiers. The Pro version is $25 a month and comes with all of the features I’ve mentioned. They Enterprise membership just says “contact us for pricing,” which is never a good sign.
By comparison, CanvaPro costs $12.99 a month and PicMonkey has three different tiers (the comparable Pro plan is $12.99 a month, too). Both offer discounts if you pay annually, where RelayThat doesn’t appear to offer that option.
I do think that the price is worth it if you need to create a lot of images quickly, though. No one beats their one-click resizer.
Using font & color ideas permanently overwrite your presets on that Workspace
So, I learned this one the hard way. I was playing around on one of my Workspaces, taking random screenshots (I wasn’t sure what I was going to use yet, so I just took some of every feature).
For the one below, I was checking out the color scheme ideas options. While that itself is a pro, I didn’t realize that by clicking on one, I was permanently overwriting my former settings.
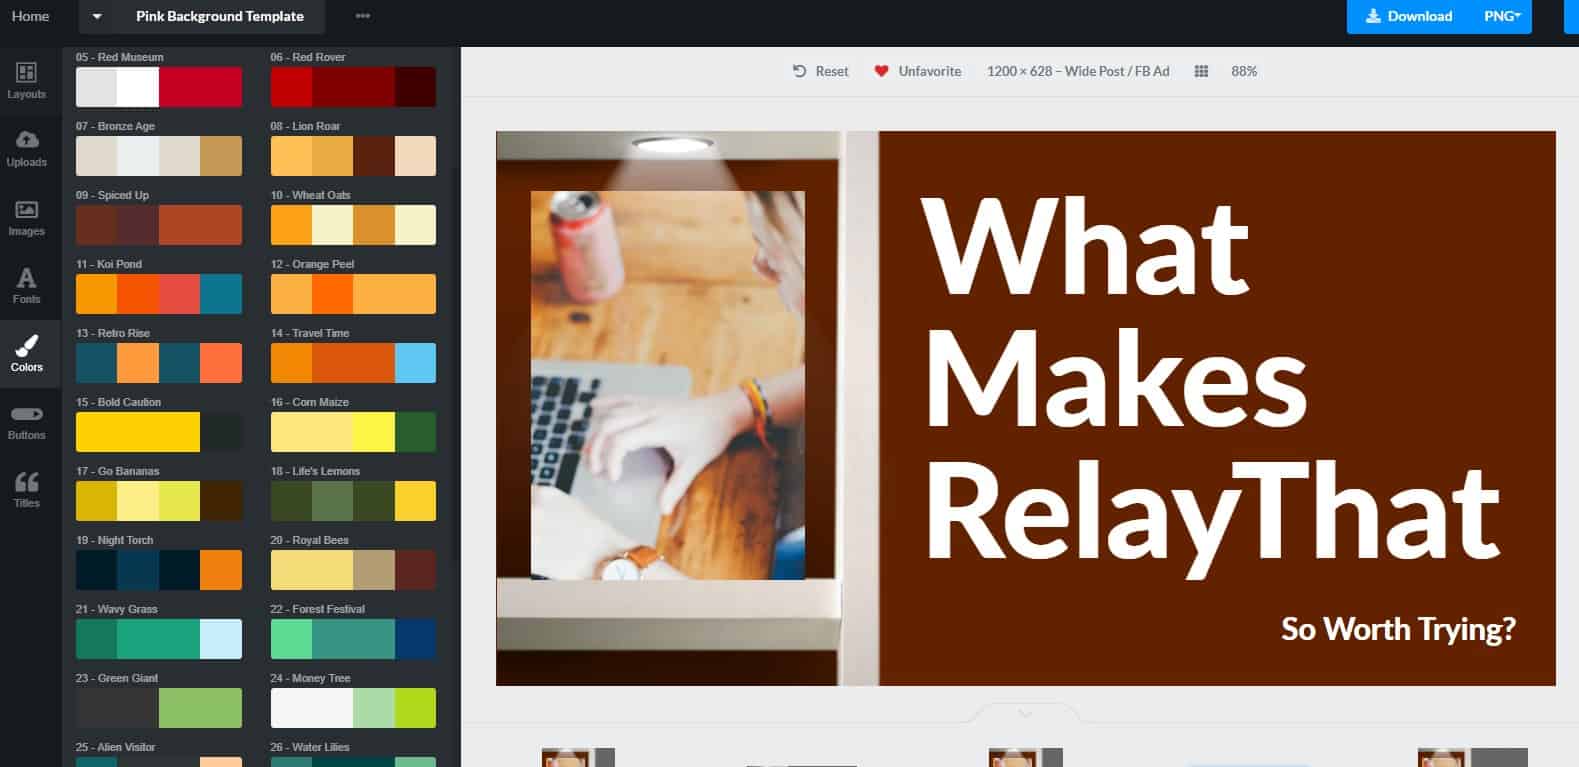
Yes, it says right at the top “Idea Presets replace current assets and can’t be undone,” but it’s kind of in small text and not really obvious. I wish they had some sort of pop-up warning asking if I’m sure I want to change my colors.
I mean it’s not the end of the world or anything. I can get the colors back by editing them in my workplace assets. It’s just a pain. That was my favorite template too.
Can’t download as PDF
The only other con that really stands out to me is the fact that you can’t download as a PDF. Given that they offer Print templates, it doesn’t really make sense to me. Also, this is a pretty standard feature in Pro-level memberships in comparable platforms
RelayThat Review : Final Thoughts
While the first two cons are fairly significant, overall the pros definitely outweigh them if you need to make a lot of images but don’t really have the time or the graphic skills to do so.
My advice (since they don’t seem to offer a free trial): sign up for a month when you know you’ll have plenty of time to really try it out. If you don’t love it, there’s no contract or commitment, so just cancel it.
Honestly, if you read through this review and thought to yourself, “sounds like something I need,” I think you’ll love it. While there are probably even more pros and features that I haven’t found yet, I truly didn’t hold back in the “cons,” so you should have a good idea if it’s right for you.
